Help & Documentation
Products
How to add multiple variants to a product?
Sometimes, you want to create products that come in different variants like size, fabric or anything you can think of. In such a case it makes sense adding your product just once, and linking variants to that product.
Let's say you are selling T-Shirts. You want them to be available in different sizes and colors like Small, Medium and Large, but also in Black, White and Red. You can do so easily as follows:
Start by adding a product like you would normally do.

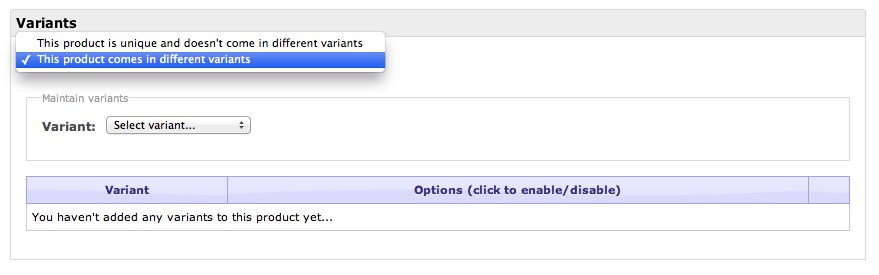
On the "Variants" tab, select the option "This product comes in different variants".
Now, you can add different variants or re-use existing ones. In this example, let's create a variant "Shirt Color" for our T-Shirt:


Now you have created a variant that can be re-used in any of your products. To link the variant to your current product, click the link "Link variant to product".
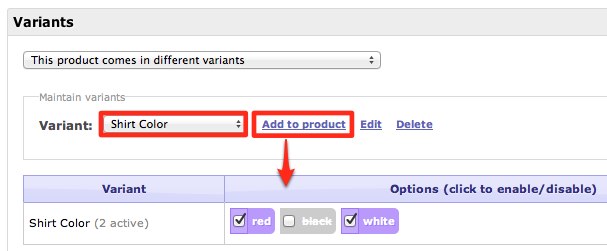
As you can see in the above screenshot, we have disabled the option "black" for this product, since we only want to sell this T-Shirt in red and white. Please note that this is just optional: you can enable or disable any of the specified options by clicking on them.
Now that we have different colors, you can do the same for sizes. Create a new variant called "Size" and add the options small, medium, large and extra large, just like you did above with shirt colors.

Now save your product and your clients will be able to choose from different colors and sizes in your store for this product. Sweet indeed.

How to set stock or price depending on product options?
Imagine that our T-Shirt from the example above costs extra when ordering an extra large. On top of that, we want to keep track of how many larges, smalls and mediums we have in stock.
Keeping track of stock per variant combination as well as price is easy. After adding the variants "size" and "color" to your product like in the example above, you can click on the button that says "Set variant prices & stock".
Please note that you have to set your stock preferences for your product to "Yes, track stock level for each variant combination" in order to track stock per shirt color and size.

In the popup screen that appears, you can now say for example that you only have 1 extra large shirt in red left.

How to add extra custom fields to your products?
In some cases, the default product fields aren't enough. Sure, there is a title and a description field and you can even add tags to products by default.
Image you want to add your own fields to a product, to have more control over what is being used for you SEO tags? Or if you are selling books, you might want to add a unique ISBN number to the book or even an author field.
Anything you want to add to your product data, you can by using custom fields. To get started, we need to create a custom field group, which contains a logical group of fields like "seo title", "seo description" or "book author" and "quote".
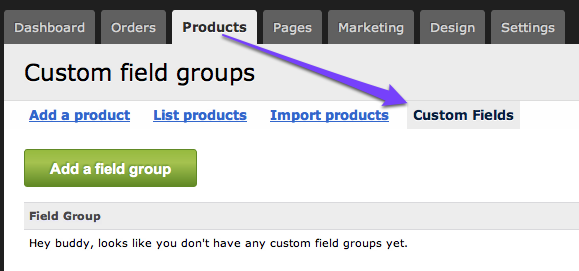
Navigate to "Products" and "Custom Fields" to create your first field group. In this example, we'll add a group called "Books" and add in two fields: "author" and "quote".
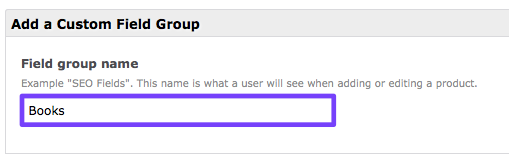
Click on the "Add a field group" button and give it the group the name "Books". You can use any name here, just don't use spaces in the name. Underscores are fine.
Next, you'll want to add some fields to this newly created field group. We'll add two fields: a text field named "author" in which we will put the author of the book. The field "quote" will be a text area that contains a marketing quote for the book.
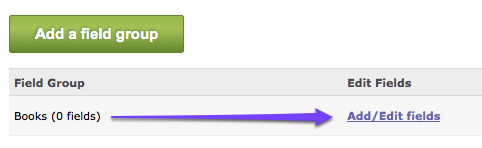
Click on the link that says "Add/Edit fields" next to your group "Books". This will open up a screen where we can add some fields to this group.
Let's start by adding a field called "author", which is a simple text field. Notice that we keep the Field Name short. This is what you'll use in your templates to get the value of this field. The Field Label on the other hand can be anything. The label will be shown to your user who is entering the product data.
Select "Text Field" as your field type and save the field.

Now let's add another field called "marketing_quote" and give it the label text "Marketing Quote". For field type, this time we select Text Area, since we want to be able to throw in multiple sentences if necessary for promoting a book.

Now, add a new product in your store. You will notice that you will now have the option to select a field group right below where you would enter your product title and description.
Select the group called "Books" from the dropdown menu and the Book Author and Marketing Quote fields you created earlier should appear. Add an author and a marketing quote to your product and save it. Make sure the product is "puslished" so that it appears in your store.

You're all set! The next step is showing this custom product data in your templates. Here's the documentation for reading out custom fields from your products.
Let's get social shall we?
We'd love to know what you think. Join the conversation about your hosted e-commerce solution.